
Choosing the right size nails for baseboard trim is important if you want a clean, professional finish. Many homeowners and even some contractors make mistakes with nail size. This can lead to problems like loose trim, visible holes, or cracked wood.
The right nails make your baseboard secure and neat. Picking the wrong ones can mean extra work later.
Baseboard trim hides the joint between the wall and the floor. It also adds style to a room. The trim needs to be attached firmly, but you also want to avoid damaging the wood or drywall. This guide covers everything you need to know about nail size for baseboard trim, including different nail types, sizes, materials, and tools.
You will find practical advice, common mistakes, and clear answers for both beginners and experienced DIYers.
Table of Contents
Why Nail Size Matters For Baseboard Trim?
The nail size affects how well the baseboard holds to the wall. If nails are too short, the trim can come loose. If nails are too long, they may hit wires or pipes behind the wall. Using nails that are too thick can split the wood. Too thin, and the trim may not stay in place.
A typical baseboard is between 1/2 inch and 3/4 inch thick, and it sits against drywall that is usually 1/2 inch thick. You need a nail long enough to go through both layers and still anchor into the framing. Using the right nail size also makes filling holes easier and helps the trim look smooth after painting.
Common Nail Sizes And Types For Baseboard Trim
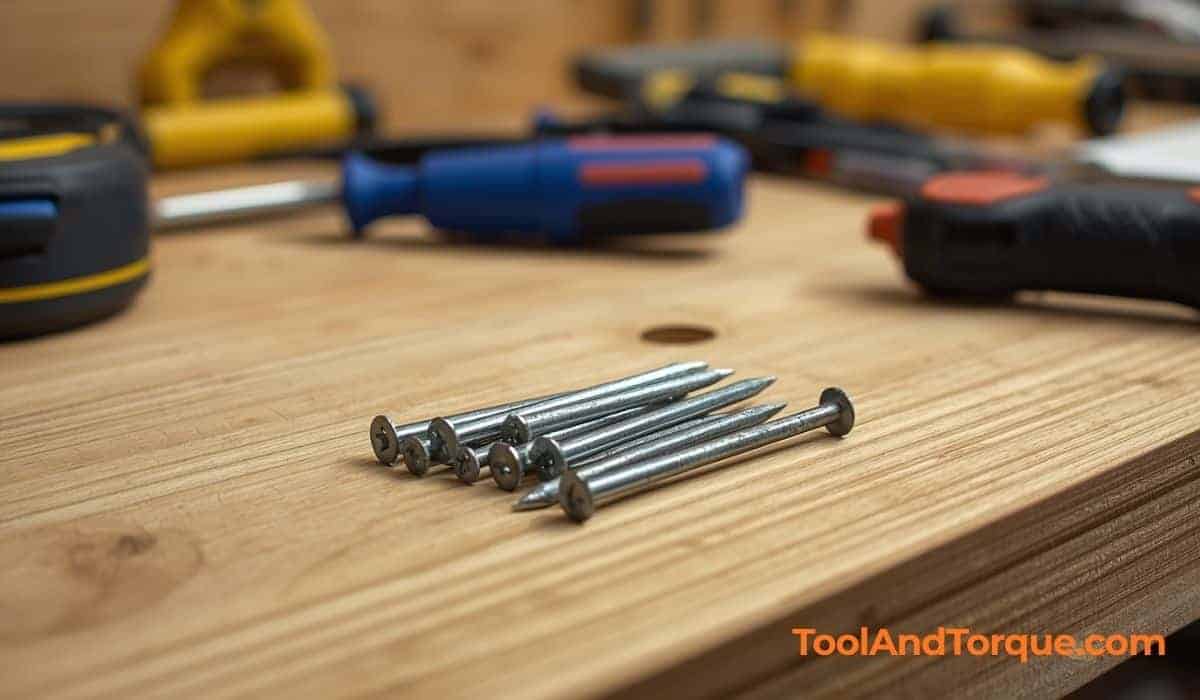
Most professionals use finish nails or brad nails for baseboard trim. These nails have small heads and are designed to be less noticeable after installation. The most common sizes are:
| Nail Type | Gauge | Length (inches) | Recommended For |
|---|---|---|---|
| Finish Nail | 15–16 | 1.5–2.5 | Baseboard, casing, larger trim |
| Brad Nail | 18 | 1.25–2 | Small baseboard, delicate trim |
| Common Nail | 8–10 | 2.5–3 | Framing (not recommended for trim) |
Finish nails are thicker and hold better, but they make slightly larger holes. Brad nails are thinner, so they’re good for smaller trim or where you want tiny holes. Most rooms with standard baseboard use 16-gauge finish nails that are 2 inches long.
Choosing The Right Nail Length
The nail must be long enough to go through the baseboard and drywall, and still anchor into the wall’s framing. For example, if you have 3/4 inch baseboard and 1/2 inch drywall, you need at least 1. 25 inches to reach the framing.
But you want extra length for strong holding power.
Ideal nail length:
- For most baseboards: 2 inches
- For thinner baseboards: 1.5 inches
- For thick or tall baseboards: 2.5 inches
Using nails shorter than 1. 5 inches can mean the trim only attaches to drywall, which is not strong. Nails longer than 2. 5 inches might go too deep and hit pipes or wiring.
Here’s a simple comparison:
| Baseboard Thickness | Recommended Nail Length | Risk if Too Short | Risk if Too Long |
|---|---|---|---|
| 1/2 inch | 1.5–2 inches | Loose trim | Wall damage |
| 3/4 inch | 2–2.5 inches | Loose trim | Pipe/wire hit |
| 1 inch+ | 2.5 inches | Loose trim | Pipe/wire hit |
Always check for wall obstructions before nailing, especially in kitchens and bathrooms.
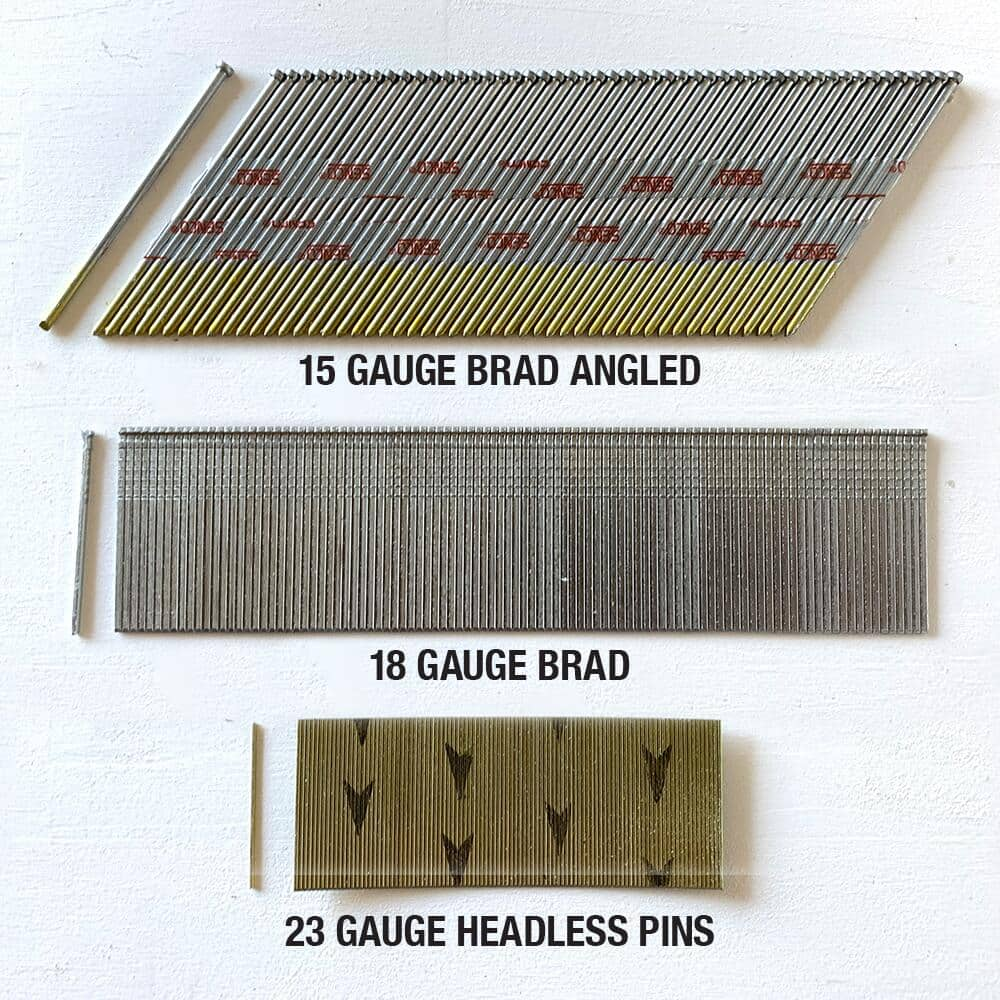
Nail Gauge: What Does It Mean?
Gauge is how thick a nail is. The higher the gauge, the thinner the nail. For baseboard trim, gauges 15, 16, and 18 are common.
- 15-gauge: Strong, good for thick or tall baseboards. Makes bigger holes.
- 16-gauge: Most popular for baseboard trim. Good balance of strength and small holes.
- 18-gauge: Thinner, used for delicate trim, or when you want very small holes.
Thicker nails (lower gauge) hold better but are more visible. Thinner nails (higher gauge) are less visible but hold less weight.
Nail Material And Finish
Most nails are made of steel. Some are coated or galvanized to prevent rust, especially in humid areas. For painted baseboards, use nails with a smooth finish so filler and paint cover them easily.
- Galvanized nails: Good for bathrooms, kitchens, or basements.
- Stainless steel nails: Used for high-moisture areas, but cost more.
- Standard steel nails: Fine for dry rooms.
If your trim is stained (not painted), choose nails that match or can be covered with wood filler.
Using Nail Guns Vs Hammer
Most professionals use a nail gun. It’s faster and gives consistent results. You can use a hammer and finish nails, but it takes longer and can leave marks.
Nail gun advantages:
- Cleaner holes
- Faster installation
- Less chance of splitting wood
Hammer advantages:
- No expensive tools required
- Good for small jobs
A nail gun can be either pneumatic (uses air) or battery-powered. Choose a gun that fits the nail gauge you need.
How Many Nails Per Baseboard?
You need enough nails to hold the trim firmly, but not so many that you weaken the wood or drywall.
- Place a nail every 16 inches along the length of the baseboard. This matches the standard spacing of wall studs.
- Use extra nails at corners, ends, and around doorways.
- For taller baseboards, use two rows of nails (one near the top, one near the bottom).
For a room with 12-foot walls, you’ll use about 8–10 nails per wall.
Filling Nail Holes For A Smooth Finish
After nailing, fill holes with wood filler or putty. Let it dry, then sand smooth. This step is important for painted baseboards. For stained trim, use filler that matches the wood color.
Large nail holes from 15-gauge nails need more filler. Brad nails (18-gauge) leave smaller holes, but don’t hold as well.
Mistakes To Avoid When Installing Baseboard Trim
- Using nails that are too short: The trim won’t anchor to framing.
- Using nails that are too thick: The wood can split, especially with delicate trim.
- Skipping stud locations: Nails only in drywall won’t hold long-term.
- Over-nailing: Too many nails can damage the trim or wall.
- Ignoring wall obstacles: Pipes and wires can be damaged by long nails.
One insight most beginners miss: always use a stud finder to mark stud locations before nailing. This ensures every nail goes into solid wood.
Special Cases: Mdf And Hardwood Baseboards
MDF baseboards are common and affordable. They are softer than wood, so use 16-gauge finish nails, not thicker ones. MDF can split with thick nails.
Hardwood baseboards are tougher. You may need 15-gauge nails for strength. Pre-drill holes if you use a hammer to avoid splitting.

Comparison: Nail Size Vs Baseboard Height
Some rooms have tall baseboards for style. Taller trim needs stronger nails.
| Baseboard Height | Recommended Nail Gauge | Recommended Nail Length |
|---|---|---|
| Up to 3 inches | 16–18 | 2 inches |
| 4–6 inches | 15–16 | 2–2.5 inches |
| Over 6 inches | 15 | 2.5 inches |
For tall baseboards, use two nails per stud: one near the top and one near the bottom.
Real-life Example: Installing Standard Baseboard Trim
Let’s say you have a 3/4 inch thick, 4-inch tall baseboard, and 1/2 inch drywall. The best choice is a 16-gauge finish nail, 2 inches long. Mark each stud, position the baseboard, and nail at each stud location. Fill holes with wood filler, sand, and paint.
This method gives a strong hold and a clean look.
Safety Tips For Nailing Baseboard
- Wear eye protection, especially with nail guns.
- Keep fingers away from the nail path.
- Check for pipes and wires behind the wall before nailing.
- If you hit resistance, stop and check before continuing.
These steps help prevent injuries and avoid costly repairs.
When To Use Adhesive With Nails?
Some installers use construction adhesive along with nails. Adhesive helps the baseboard stay tight against uneven walls. Apply a thin line of adhesive to the back of the trim, then use nails at the studs. This combination gives the best results for wavy walls or older homes.
Don’t skip nails entirely; adhesive alone can fail over time.
Alternatives To Nails For Baseboard Trim
Nails are the standard, but sometimes screws or adhesive are used for special cases.
- Screws: Used for very thick or heavy trim, but leave larger holes.
- Adhesive only: Sometimes used when nailing isn’t possible (for example, concrete walls), but not as secure.
- Pin nails: Even thinner than brad nails, used for very delicate trim.
For most homes, 16-gauge finish nails are the best choice.
Expert Tips For A Professional Finish
- Use a nail set to sink nail heads below the surface.
- Use high-quality filler for holes; cheap filler can shrink and crack.
- Sand filler smooth before painting for best results.
- Paint the baseboard after installation for a seamless look.
- Choose nails that match your baseboard material and room conditions.
Many beginners forget to sand the filler after it dries. This leaves rough spots that show under paint.
Frequently Asked Questions
What Size Nails Should I Use For 1/2 Inch Thick Baseboard?
For 1/2 inch thick baseboard, use 16-gauge finish nails that are 1.5–2 inches long. This ensures the nail goes through the baseboard and drywall and anchors into the framing. Avoid nails shorter than 1.25 inches.
Can I Use Brad Nails For Baseboard Trim?
You can use 18-gauge brad nails for thin or small baseboards, but they are less strong than finish nails. For standard baseboard, 16-gauge finish nails are safer and give a stronger hold.
How Do I Know If My Nails Are Hitting A Stud?
Use a stud finder to mark stud locations before nailing. Nail at these marks. If you feel solid resistance, the nail is in a stud. If the nail goes in easily, it’s probably just in drywall.
Should I Use Adhesive With Nails For Baseboard?
Adhesive is helpful for uneven walls or older homes. It helps the baseboard stay tight. Use a thin line of adhesive along the back of the trim and nails at the studs. Avoid using adhesive alone.
What Is The Best Nail Gun For Baseboard Trim?
A 16-gauge finish nailer is the most popular tool for baseboard trim. It holds standard nails and is easy to use. Pneumatic and battery-powered nail guns both work well. Choose one that fits your budget and project size.
Final Word
Baseboard trim adds value and style to any room. Choosing the right nail size is key for a strong, neat finish. Always use nails long enough to reach the wall framing, with the right gauge for your baseboard material. With careful planning, the right tools, and attention to detail, your baseboard will look professional and last for years.
Leave a Reply